I was idly reading through the I Shoot Film forums on Flickr yesterday on the way home, when someone mentioned a process called “bleach bypass”. I’d heard of it before but didn’t really understand how to do it, or what the effects would be. A few clicks later and I realised that it’s actually pretty simple if you’re already set up for C41 and B&W development.
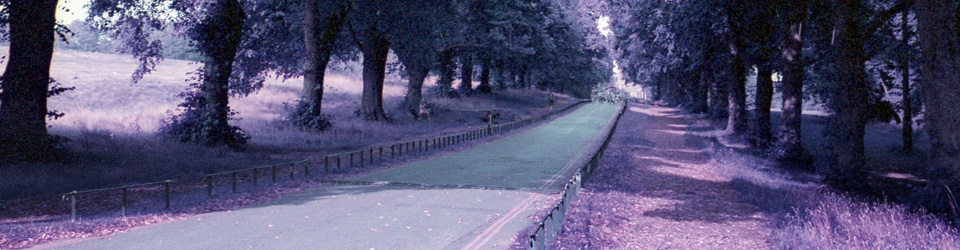
When I got home the sun was still out, so I threw some cheap film (yes, I still have stacks of expired Ferrania 200) into my trusty Yashica and headed out to take some local shots as the sun was setting. The light meter on the camera was telling me that it was quite bright, which I didn’t believe (sunny 16 at 7.30pm in the UK in April?!) so I increased exposure slightly – in hindsight I should have trusted the meter as a lot of the shots were quite overexposed.
 <- My trusty Yashica Minister II
Development
Normally with colour development I use the Tetenal 1l kit, which is a 3-bath system – colour developer, “blix” (a mixture of bleach and fixer) and stabiliser. To do the bleach bypass I had to replace the blix with a B&W fixer (I use Ilford rapid fixer 1+4). I also added an extra rinse between the developer and the fixer as I didn’t want to contaminate my fixer.
One thing I struggled with was temperatures which no-one seems to discuss – the colour developer works best at exactly 100F, but I don’t normally use the fixer at those temperatures. However, I know from reading that you’re supposed to keep temperatures roughly consistent while developing as film emulsion doesn’t react well to sudden temperature changes, so I decided to heat everything (including the rinse water) to around 100F before starting.
I ended up with this recipe:
- Colour developer for 3.45 minutes @ 100F (mine is quite exhausted)
- Rinse for 4 minutes @ ~100F
- Ilford Rapid Fixer 1+4 for 4 minutes @ 100F
- Rinse for 4 minutes @ ~100F
- Stabiliser for 1.5 minutes @ ~100F
Next time round, I’m going to rinse the fixer for much longer – I realise I normally do this for 10 minutes with B&W and I’ve ended up with a lot of gunk on the negatives, so maybe this is why.
Scanning
As the negatives dried I was glad to see some recognisable images coming through with patches of colour, so at least it vaguely worked. However, scanning them as normal colour negatives proved problematic – the scanner really struggled to find the images, and even when it did it was unable to get the contrast right – I’ve never had this problem before with the scanner so I’m guessing the extra silver in the negative must really be confusing it.
In the end I found some hints on the web suggesting scanning as colour positive, then inverting and adjusting in Photoshop – this worked brilliantly, using “auto-tone” in Photoshop to bring out the colours.
The Results
The end results are.. well.. you decide! I’m quite pleased with them for a first attempt, although I think I can do better. Many of the shots were over-exposed, and the bleach bypass enhances the over-exposed parts as well, so they didn’t work very well. However, some worked just fine, and the grain is much finer than with my colour-film-in-black-and-white experiments.
Here they are – streaks, fingerprints, dust and cat hair included for free:


– click on the images to see higher resolutions on Flickr.
